
Table of Contents
- When You Need to Remove Solar Panels for Roof Work
- What You’ll Need Before Starting
- Step-by-Step Solar Panel Removal Process
- Cost of Removing Solar Panels for Roofing
- Roof Inspection and Repair During Panel Removal
- Reinstalling Solar Panels After Roof Work
- Professional Installation vs. DIY Removal
- Common Mistakes to Avoid
- Frequently Asked Questions
Last Updated: September 30, 2026
When You Need to Remove Solar Panels for Roof Work
Removing solar panels for roof replacement is one of the most complex exterior projects a homeowner can undertake. Unlike a standard roof replacement, you’re managing two systems at once: the roofing structure beneath and the photovoltaic system above it. The process requires careful coordination between electrical work, structural assessment, and reinstallation planning.
Most homeowners need panel removal when roof damage becomes unavoidable, weather damage, aging shingles, or structural issues. With proper planning, the process is manageable and your system returns to full function once roof work is complete.
Understanding what happens at each stage, from disconnection through reinstallation, lets you coordinate the work efficiently and protect your investment.
Schedule your roof inspection and solar panel assessment simultaneously. This prevents multiple trips and lets you plan the entire removal and reinstallation sequence upfront.
What You’ll Need Before Starting
Tools and Safety Equipment
Essential tools include:
- Insulated screwdrivers and wrenches (for electrical disconnection)
- Torque wrench (to ensure proper reinstallation tension)
- Voltage tester and multimeter (to verify power is off)
- Ladder rated for roof access
- Harness and fall protection equipment
- Flashlight or headlamp for reading labels and connectors
Safety equipment is non-negotiable. Working with electrical systems on a roof combines height and electricity hazards. You need a harness rated for your weight and roof pitch, and voltage testers to confirm no power flows through connectors before touching them.
Solar systems remain live even on cloudy days. A voltage tester is not optional, it’s your first line of defense against shock.
Documentation and Permits
Before touching anything, gather documentation on your solar system. You need:
- Original installation paperwork and system diagrams
- Electrical permits and inspection records
- Warranty documentation
- Net metering agreement with your utility provider
- Manufacturer specifications for your panels and inverter
In many jurisdictions, removing and reinstalling a solar system requires an electrical permit. An inspector verifies that reconnection meets current electrical code and grounding is correct.
Notify your utility provider before removal begins. Some have specific procedures for temporary disconnection, and failing to notify them can delay net metering credit restoration.
Skipping the permit step can void your warranty and create liability issues if something goes wrong during reinstallation. The inspection fee is minimal compared to the cost of correcting unpermitted work.
Step-by-Step Solar Panel Removal Process
Step 1: Disconnect the Electrical System
Electrical disconnection is the critical first step. You cannot proceed with physical removal until power is safely isolated.
Start by turning off the main disconnect switch, typically located near your inverter or on an exterior wall. However, this does not make the system safe to touch, panels still generate electricity in sunlight.
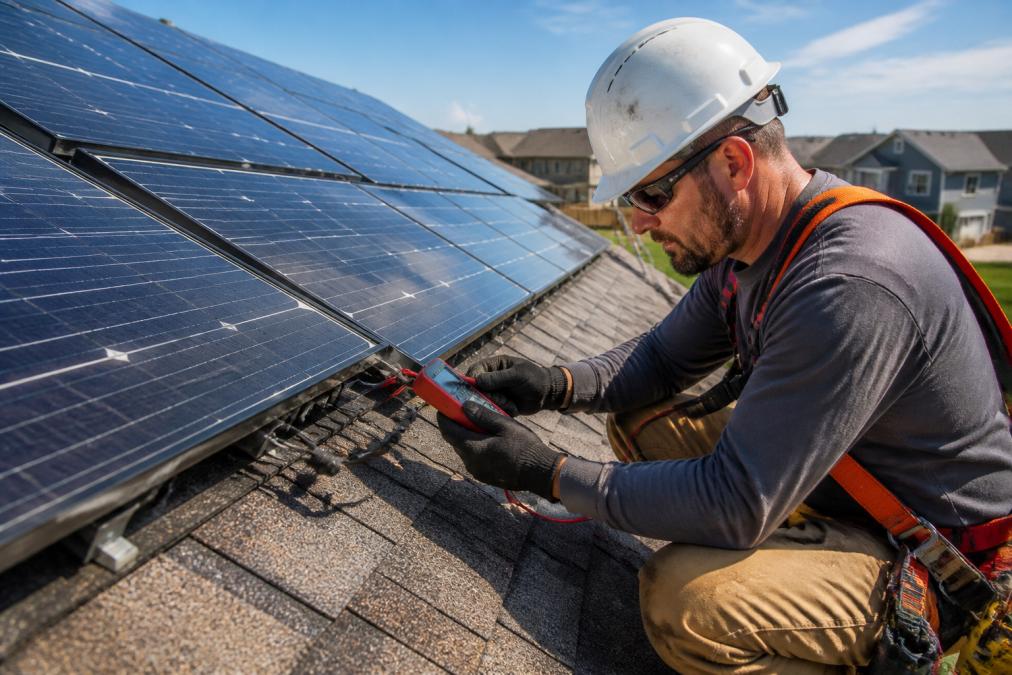
Use your voltage tester on each electrical connector, testing between positive and negative terminals to confirm zero voltage. Test multiple times at different points to be certain.
Document each connector location with photos and label each wire and connector with numbered tape, these become your reinstallation guide.
If your system has battery backup or microinverter components, hire a licensed electrician for disconnection, as the process is more complex.
Step 2: Disconnect Mounting Hardware
Once electrical connections are safe, disconnect the physical mounting system by removing lag screws and bolts that anchor the mounting brackets to the roof.
Locate each fastener and remove it using the appropriate wrench or socket, working systematically across the array to prevent panels from shifting unexpectedly.
Support the panel weight as you remove fasteners, one person should support while another removes them. Dropping a panel damages it beyond repair and creates safety hazards.
Keep fasteners organized. You will reinstall them, so store them in labeled containers. Note which fasteners came from which mounting point, roof penetrations matter. Using the same fasteners in the same holes ensures proper waterproofing.
Step 3: Remove Panels and Flashing
With electrical connections severed and mounting hardware removed, panels can be safely lifted away. Move slowly and deliberately.
As you remove each panel, inspect the flashing underneath. Damaged or degraded flashing is a common source of roof leaks after panel removal.
If flashing is in poor condition, note this for your roofer. New flashing may need to be installed during the roof work. This is part of the roof inspection and repair phase that happens while panels are off.
Stack removed panels in a safe location, preferably indoors or in a garage. Panels left outdoors can be damaged by weather or accidentally stepped on. If you must store them outside, cover them and keep them flat.
Cost of Removing Solar Panels for Roofing
Costs vary based on system size, complexity, and whether you hire professionals or attempt removal yourself.
Professional removal and reinstallation involves labor charges for electrical work, mechanical disconnection, and handling. Complexity increases costs significantly. Your electrician can provide a quote once they assess your specific setup.
System downtime has a cost, you lose net metering credits during removal and roof work. Planning for the off-season minimizes this impact since production is lower anyway.
Removing panels yourself to save money is almost never advisable. The electrical hazards, risk of damaging equipment, and reconnection complexity make professional help the safer choice.
Factor in three costs: professional removal labor, roof repair materials and labor, and reinstallation labor. Do not budget only for removal, the full cycle determines total project cost.
Roof Inspection and Repair During Panel Removal
With panels removed, your roofer can finally see the roof surface beneath. This is the moment to assess structural integrity, identify damage, and plan repairs.
The inspection typically reveals roof penetrations where mounting brackets attached. These holes must be sealed with new flashing and roofing material. Damaged shingles should be replaced while the area is accessible.
Rafters and roof decking are now visible. Your roofer can assess their condition and recommend repairs if rot or structural damage is present. Catching structural issues before reinstalling panels prevents problems later.
The timing of roof work affects panel reinstallation. If your roofer replaces shingles or flashing around the mounting areas, those materials must cure before panels are reinstalled. Most roofing materials need 24-48 hours before bearing load. Coordinate timing with your electrician so reinstallation happens after curing is complete.
Document the roof condition with photos before and after repairs. This record helps with insurance claims if storm damage was the reason for the project. It also serves as proof of the work done if you sell the property.
Reinstalling Solar Panels After Roof Work
Testing System Performance
Before reconnecting panels to the grid, the system must be tested. This is not optional, it is a requirement for safe reconnection and for maintaining your warranty.
Testing begins with a visual inspection of all components. Check that all electrical connectors are clean and undamaged. Verify that the inverter has no error codes displayed. Confirm that all disconnect switches are in the correct position.
Next, use a multimeter to test voltage at various points in the system. Measure the voltage generated by the panel array in sunlight. Compare this reading to the system specifications. If voltage is significantly lower than expected, there may be a connection problem or a damaged panel.
Test the grounding system. Proper grounding protects against electrical faults. Your electrician should verify that all grounding conductors are connected and that the grounding resistance is within code limits.
Only after these tests pass should the system be reconnected to the grid. Your utility provider may require an inspection before net metering can resume. This inspection verifies that the system meets current electrical code and that reconnection was done properly.
Reconnecting Electrical Components
Reconnection follows the reverse sequence of disconnection. Start by reconnecting the array to the inverter, using your photographs and labels as a guide. Each connector must be fully seated and secure.
Torque specifications matter. Over-tightening connectors damages them. Under-tightening creates poor electrical contact and heat. Your system documentation specifies the correct torque for each connector type. Use a torque wrench and tighten each connection to specification.
Once the array is connected to the inverter, verify voltage again. The system should show the same voltage readings as before removal.
Professional Installation vs. DIY Removal
Deciding between professional help and DIY removal is a practical question with safety and financial implications.
Homeowners who want their roofing project managed by a single team. HighLow manages the complexity so you don’t have to coordinate multiple contractors.
Common Mistakes to Avoid
Understanding common errors helps you plan better and communicate clearly with contractors.
Frequently Asked Questions
Do I need a professional to remove solar panels for roof work?
Removing solar panels involves electrical safety risks and structural considerations that require expertise. The disconnect switch, electrical connectors, and grid interconnection must be handled according to electrical code. Most homeowners benefit from hiring a certified installer or electrician to manage disconnection, while roofing professionals handle the structural removal. This ensures your system downtime is minimized and reinstallation proceeds safely.
What is the cost of removing solar panels for roofing?
The cost of removing solar panels for roofing depends on system size, mounting bracket complexity, and whether reinstallation is included. Labor costs vary based on roof pitch, accessibility, and local market rates. For a complete estimate that accounts for disconnection, removal, roof repair, and reinstallation, contact a professional contractor who can assess your specific setup and provide transparent pricing based on your project scope.
How long does system downtime last during roof replacement?
System downtime typically spans the entire roof replacement period, which can range from several days to weeks depending on roof size and weather. During this time, your photovoltaic system generates no power and you lose net metering credits. Planning the work during lower-energy seasons and coordinating closely with your roofing contractor minimizes this impact. Ask your installer about expedited reinstallation timelines to restore grid interconnection as quickly as possible.
Will removing and reinstalling solar panels void my roof warranty?
Roof warranties can be affected by panel removal if the work damages the roofing material or flashing. To protect your warranty, hire professionals experienced with solar-specific roof work who understand waterproofing and flashing requirements. Coordinate with your roofing contractor before removal to ensure they acknowledge the solar system work. Document all removal and reinstallation steps, and confirm with your roof manufacturer that warranty coverage remains valid after the project is complete.