
Table of Contents
- Assess the Damage and Prioritize Safety
- Storm Damage Repair Checklist: What to Document
- Temporary Roof Leak Protection While You Wait
- What to Tell a Roofer After Storm Damage
- Verify the Contractor Before Authorizing Work
- Emergency Roofing Service Response Time and Booking
- File Your Insurance Claim and Document Everything
- What Happens After the Emergency Booking
- Frequently Asked Questions
Last Updated: October 5, 2026
Assess the Damage and Prioritize Safety
The first step after a storm is evaluating your roof and property, once it’s safe.
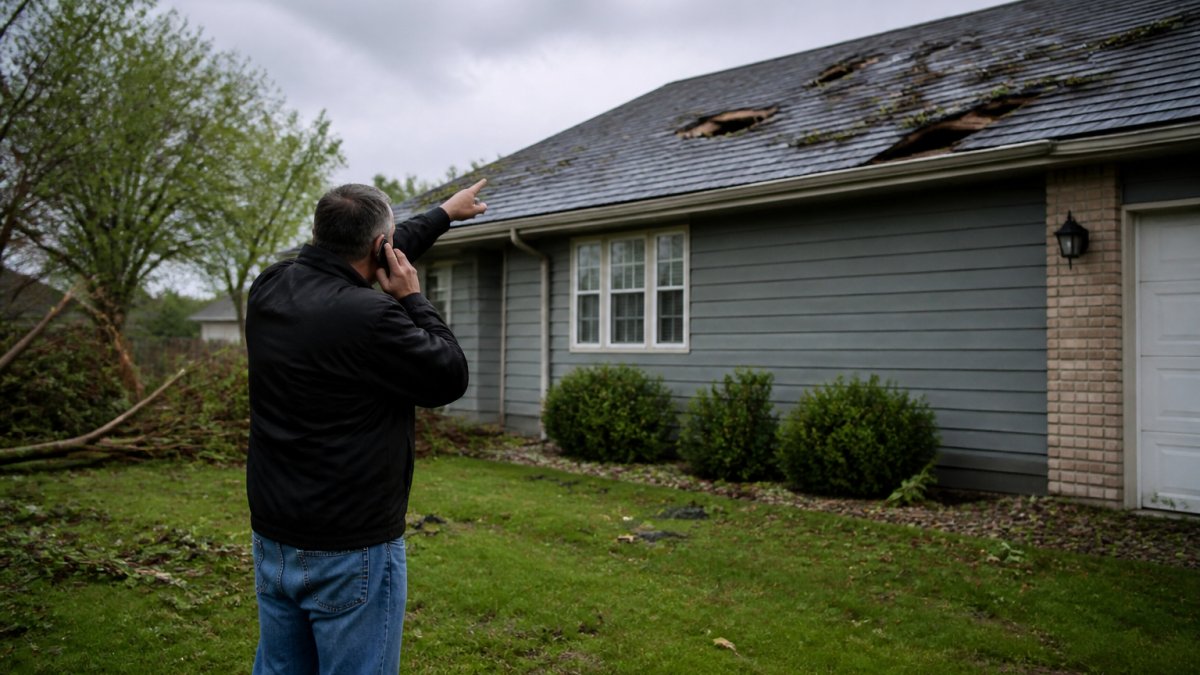
Don’t climb onto your roof. Water damage, structural weakness, and debris create serious hazards.
Check the attic if you can access it safely. Water stains on rafters or insulation indicate leaks; soft drywall or mold suggests older damage.
Document everything with wide shots and close-ups for insurance claims and contractor estimates.
If you see electrical hazards, downed power lines, or severe structural damage, stay back and call emergency services.
Storm Damage Repair Checklist: What to Document
When you book emergency storm damage repair, contractors need specific information to respond effectively. Having it ready speeds up the process and improves estimate accuracy.
Create a simple checklist before you call:
- Property address and contact information, Your full address, phone number, and best time to reach you
- Date and type of storm, When the weather event occurred and what kind (wind, hail, heavy rain, snow load)
- Visible damage locations, Which parts of the roof, siding, gutters, or windows are affected
Organized information means no scrambling during the call, and contractors can prioritize your situation and arrive with the right equipment.
Temporary Roof Leak Protection While You Wait
While you wait for professional help, stopping water from entering your home is critical.
Temporary tarping can help if you’re handy and the weather is safe for climbing.
Don’t use duct tape or caulk on wet surfaces. They won’t adhere properly and can trap moisture.
Keep gutters clear of debris if you can do so safely from the ground; clogs worsen water backup and interior damage.
What to Tell a Roofer After Storm Damage
When you speak with a roofing contractor, be direct about what happened and what you’ve observed so they understand the scope and respond with urgency.
Start with the storm details: date, type of weather event, and severity.
Tell them what temporary steps you’ve taken, such as placing buckets under leaks or moving furniture away from wet areas.
Ask about response time, “How soon can you get here?” and “Do you have availability today?” Some offer same-day emergency assessments; others take longer.
Verify the Contractor Before Authorizing Work
Emergency pressure is exactly when poor operators count on you to skip checks. Verifying a contractor takes about fifteen minutes and is your best protection before authorizing work.
The document checklist
Ask for these before anyone climbs a ladder:
- Business registration. A legitimate company can provide its legal business name and registration details, which you can confirm through the appropriate provincial or territorial corporate registry.
- Trade or contractor licensing. Requirements vary by province and territory. Ask which credentials apply to roofing work where you live, then verify them through the issuing authority rather than trusting a photocopy.
- Liability insurance. Request a certificate of insurance showing current coverage, then call the insurer to confirm it is active, certificates can be altered or expired.
Photograph or scan every document you receive and store the copies somewhere you can access them later. If a dispute arises, your records are your leverage.
Red flags to watch for
- Pressure to decide immediately. Urgency is real after a storm, but a legitimate contractor will still give you time to read a contract.
- Cash-only requests or unusual payment methods. Standard practice is a traceable payment method with a receipt.
- No physical business address or only a mobile number. Ask where the business operates from.
- Door-to-door solicitation with no verifiable credentials. Storm-chasing crews move between regions and can be difficult to reach after they leave.
Questions worth asking before you sign
- Who will be on my roof, and are they employees or subcontractors?
- Is the person quoting the job the same person supervising the work?
- What is the estimated start date, and what could delay it?
- How will you protect landscaping, siding, and windows during the work?
Emergency fees and written scope
Some contractors charge a premium for after-hours or same-day emergency response. Ask directly whether an emergency call-out fee applies, what it covers, and whether it is credited toward the repair if you proceed. Get the answer in writing before you authorize anything.
Make sure the written scope distinguishes between temporary mitigation, tarping, water extraction, boarding, and permanent repair. These are separate authorizations: you should be able to approve emergency stabilization without committing to the full repair, and never sign a permanent-repair contract before you have an adjuster’s assessment in hand.
Never sign a document that assigns your insurance rights to a contractor or authorizes them to negotiate your claim on your behalf without independent legal advice. Read every page, including the fine print on the back.
If something feels wrong
You are allowed to say no. If a contractor won’t provide documents, won’t put terms in writing, or pressures you past your comfort level, end the conversation and contact another company. A slower response from a verified contractor beats a fast response from an unverified one.
If you believe you’ve been misled or defrauded, report it to your provincial or territorial consumer protection office and, where relevant, to local police.
Emergency Roofing Service Response Time and Booking
When you book emergency storm damage repair, response time varies based on demand, weather, and location.
Same-day emergency service exists but isn’t guaranteed.
Call early in the morning if possible, an early call puts you higher in the queue.
Online booking is faster than phone calls for some contractors.
Be flexible with timing.
Ask about payment options. Some contractors require a deposit to secure emergency service.
File Your Insurance Claim and Document Everything
Most homeowner insurance policies cover storm damage to roofs and exteriors.
Your insurer will assign an adjuster to inspect the damage and determine what’s covered.
Take photos and videos before the adjuster arrives and after they leave to create an independent record.
Keep receipts for any temporary repairs or emergency services, tarping materials, buckets, or emergency water removal may be reimbursable.
Get a written estimate from a contractor; your insurer will use it to determine the payout.
What Happens After the Emergency Booking
Once you have booked emergency storm damage repair, the process follows a predictable sequence. Knowing what comes next, and what’s expected of you, keeps the job moving.
Stage 1: Dispatch and confirmation
Within a reasonable window after booking, you should receive a confirmation with:
- The company name and the technician or crew assigned
- An estimated arrival window, not just a day
- A direct contact number in case conditions change
- A brief description of what the first visit covers
If you haven’t heard back within the promised window, call to confirm, a quick check keeps your job from slipping down the queue.
Stage 2: On-site assessment
The first visit is an inspection, not a repair. Expect the contractor to:
- Walk the exterior from the ground and, if safe, access the roof
- Inspect the attic or interior ceiling where leaks are suspected
- Photograph and document damage for the estimate and your insurer
- Identify immediate safety hazards like exposed wiring, unstable structure, or falling debris
Be present if possible and point out everything you’ve noticed, including small signs like a faint ceiling stain or a musty closet smell. Details mentioned now are easier to include in the estimate than to add later.
Stage 3: Temporary stabilization
If active leaks or exposure exist, the contractor may install temporary protection during or shortly after the assessment, including:
- Tarping over damaged roof sections
- Boarding over broken windows or openings
- Water extraction and drying equipment
- Isolating electrical hazards until a licensed electrician can attend
Temporary stabilization is not a repair, it stops further damage while you wait for insurance approval and permanent work. Ask the contractor to document what was done with photos and a written description, since your insurer may reimburse it separately.
Keep temporary mitigation and permanent repair as two separate authorizations. Approving emergency stabilization should never commit you to a full repair contract.
Stage 4: Written estimate and scope
After the assessment, you should receive a detailed written estimate that includes:
- Line items for labor and materials, with quantities where possible
- The scope of work, including exclusions
- An estimated timeline with start date and expected duration
- Conditions that could change the price, such as hidden damage found during work
Compare this estimate against your adjuster’s assessment. If they differ significantly, ask the contractor to explain the difference in writing before you proceed.
Stage 5: Insurance coordination and approval
If you’re claiming through insurance, the adjuster’s assessment determines what’s covered. Your contractor can often communicate directly with the adjuster to clarify scope, provide photos, and answer technical questions, this back-and-forth is normal and usually speeds up approval.
Do not authorize permanent repairs until you understand what your policy will cover. If the approved amount doesn’t match the estimate, discuss options with your insurer and contractor before signing anything.
Stage 6: Scheduling and permanent repair
Once the estimate is approved and insurance is settled, the contractor schedules the work, within days or several weeks, depending on scope and material availability.
During the repair, expect the crew to:
- Protect landscaping, siding, and windows before starting
- Remove damaged materials and dispose of debris
- Install new materials to the agreed specification
- Clean the site at the end of each working day
Ask who the on-site supervisor will be and how you’ll be contacted if questions arise during the work.
Stage 7: Final walkthrough and warranty
When the work is complete, walk the property with the contractor. Confirm that:
- All damage identified in the scope has been addressed
- Debris has been removed and the site is clean
- Gutters, flashing, and penetrations have been checked
- Interior damage from leaks has been assessed and addressed
Request the warranty in writing before final payment. It should state what’s covered, for how long, whether it’s transferable, and how to make a claim.
Stage 8: Documentation and follow-up
Keep a single file containing:
- The original estimate and signed contract
- Any change orders
- Before-and-after photos
- Receipts for temporary measures and out-of-pocket costs
This file is useful for a warranty claim, a future insurance claim, or selling the property. Some contractors schedule a follow-up inspection after the first heavy rain to confirm the repair is watertight, ask whether this is included.
Mark your calendar for a check of the repaired area after the next significant storm. Catching a small issue early is far easier than repairing a new leak.
Frequently Asked Questions
What should I do first after discovering storm damage to my roof?
First, ensure everyone’s safety by staying off the roof and away from downed power lines. From ground level, document visible damage with photos and video. Check your attic or upper rooms for water leaks, stains, or moisture. Then contact a professional contractor for an on-site inspection. Do not attempt repairs yourself, emergency roof damage can be hazardous. The faster you assess and book emergency roofing service, the sooner you prevent further interior damage.
What information should I provide when booking emergency storm damage repair?
When you call, have ready: the date and type of storm (wind, hail, heavy rain, snow); visible damage locations (roof, gutters, siding, windows); whether you have active leaks inside; your insurance details; and photos of the damage. Describe what you tell a roofer after storm damage clearly: ‘I see missing shingles on the north side’ or ‘water is dripping into the bedroom.’ This helps the contractor prioritize the most urgent areas and arrange the right crew and materials for rapid response.
How long does emergency roofing service response time typically take?
Response times vary based on weather severity and contractor availability. Many emergency services aim for same-day or next-day dispatch during storm season. When you book emergency roofing service, ask directly about their response time commitment. Some contractors offer 24/7 availability for critical situations like active leaks. The sooner you call, the sooner you secure a slot. During peak storm periods, response may take 2-3 days, so booking immediately after damage is discovered is critical to prevent water infiltration and structural damage.
Can I protect my roof with temporary tarping while waiting for permanent repairs?
Yes. Temporary roof leak protection through tarping is a standard emergency measure. A professional contractor will secure a heavy-duty tarp over damaged areas to block rain and snow until permanent repairs are completed. This weatherproofing prevents water from entering walls, attics, and living spaces. You can also use tarps as a short-term DIY measure if professional help is delayed, but ensure they are secured safely and do not create fall hazards. Always ask your contractor about temporary tarping options when you book emergency storm damage repair.