

Last Updated: October 23, 2026
Quick Summary
Emergency roof repair is often covered by home insurance when the damage comes from a sudden event your policy lists as a covered peril, such as wind, hail, fire, or a falling tree. Insurance covers the event, not the wear that led up to it, so gradual damage and neglect are usually excluded.
- A roof leak is covered when it traces back to a sudden, accidental event, not age or poor upkeep.
- Emergency tarping and other mitigation costs are often reimbursed, so keep every receipt.
- Photograph the damage before you tarp anything so your adjuster can see the original damage.
- Authorize mitigation the same day, but hold permanent repairs until the adjuster has inspected.
- Disputes are won on documentation: two itemized scopes, written reasons for each cut, and a dated contact log.
Table of Contents
- Is Emergency Roof Repair Covered by Insurance? The Short Answer
- Does Home Insurance Cover Roof Leaks?
- Covered Causes vs. Excluded Damage: What Your Policy Actually Pays For
- Temporary Roof Repairs and Your Insurance Claim: What Gets Reimbursed
- The Roof Damage Insurance Claim Process, Step by Step
- Roof Insurance Claim Documentation: Photos, Receipts, and Records
- When Insurer, Contractor, and Homeowner Disagree on Scope or Cost
- Frequently Asked Questions
Is Emergency Roof Repair Covered by Insurance? The Short Answer
Yes, emergency roof repair is often covered by home insurance, but only when the damage comes from a sudden event your policy lists as a covered peril.
The catch is simple. Insurance covers the event, not the wear that led up to it. A storm that tears off shingles is one thing.
Below, we break down exactly how emergency roof repair works with a claim, what gets reimbursed, and the steps to take in the first hour after damage hits.
Does Home Insurance Cover Roof Leaks?
A roof leak is covered when it traces back to a sudden, accidental event.
This is the single biggest source of confusion we see. Homeowners see water on the ceiling and assume the claim is automatic. Your insurer will ask one question first: what caused the leak?
- Covered: a windstorm lifts shingles, rain gets in, and the ceiling stains within days.
- Covered: hail cracks the shingles or punctures a vent, and water follows.
- Not covered: a worn seal around a chimney lets water in slowly over months.
The difference comes down to sudden and accidental damage versus gradual damage. Your home insurance policy is built to respond to the first.
If you notice a small leak and wait weeks to report it, your insurer may treat the resulting damage as gradual and deny the claim. Report interior water damage as soon as you spot it, even if the roof itself looks fine.
Covered Causes vs. Excluded Damage: What Your Policy Actually Pays For
Most claims hinge on matching the damage to a covered peril in your policy wording. Here is how the two lists usually break down.
Damage That Is Usually Covered
Standard policies typically respond to these events:
- Storm damage from high winds that lift, crease, or tear off shingles
- Hail damage that cracks shingles, dents metal, or punctures vents
- Wind damage that sends a falling tree or branch onto the roof
The key is that the roof was in reasonable shape before the event. Your maintenance history matters here. If you can show the roof was sound, the claim is stronger.
Damage That Is Usually Excluded
These are the policy exclusions that catch homeowners off guard:
- Wear and tear and normal aging of shingles
- Gradual damage from a leak that went unfixed
- Poor installation or faulty workmanship
Roof age plays a role too. An older roof can still be covered for a sudden event, but insurers look closely at condition. A roof near the end of its life may be settled at actual cash value rather than replacement cost, which means depreciation comes off the payout (Alberta continues to see large-scale impacts from hailstorms).
The cause of the damage decides the claim, not the size of the repair. Document what happened and when. A clear cause is worth more than a big repair estimate.
Temporary Roof Repairs and Your Insurance Claim: What Gets Reimbursed
Emergency temporary repairs are often covered, and this is where many homeowners leave money on the table. When a storm opens your roof to the weather, you have a duty to mitigate further damage (Severe Weather Insurance Help).
Typical covered steps include:
- Emergency tarping to seal an open section of roof
- Boarding up a broken section after a falling tree
- Patching a small area to stop an active roof leak
Keep every receipt. Most policies reimburse these costs as part of the claim, but only if you can prove what you spent and why.
Here is the distinction that matters. Emergency mitigation stops the damage from getting worse. Permanent repairs restore the roof. Insurance usually covers both, but the mitigation work must happen first and must be documented.
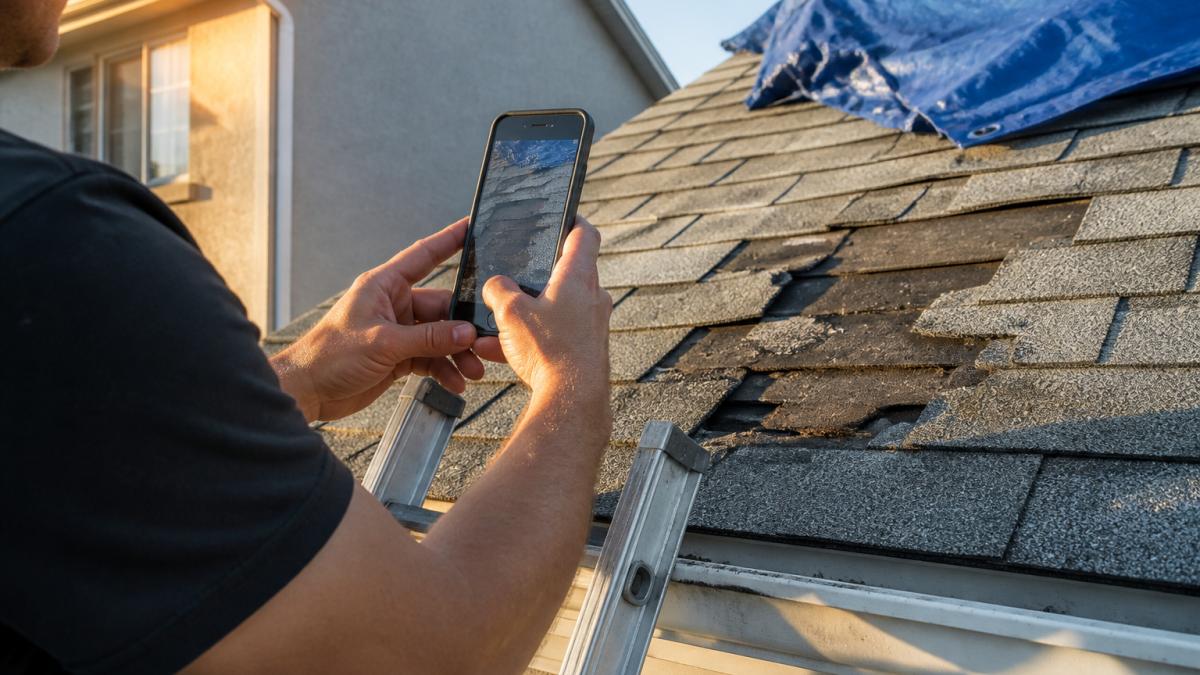
Photograph the damage before you tarp anything. Once the tarp is on, the original damage is hidden, and your insurance adjuster needs to see it. Take wide shots and close-ups, then cover the roof.
The Roof Damage Insurance Claim Process, Step by Step
The roof damage insurance claim process moves faster when you follow a clear order and understand what you are allowed to authorize before an adjuster arrives.
What to Do in the First Hour, First Day, and Following Days
First hour: stay safe and stop the water.
- Do not climb onto a damaged roof. Wet shingles, loose sections, and downed power lines are genuine hazards. If you see sagging decking, cracked rafters, or water near electrical fixtures, stay off the roof and keep others away.
- Move valuables and furniture away from leaks inside.
- Place buckets and towels to catch drips, and if water is pooling near outlets or a fuse panel, shut off power to that area at the breaker.
First day: document everything.
- Photograph and video the damage inside and out, including wide shots that show the whole roof and close-ups of failed shingles, dents, or punctures.
- Save any damaged items rather than discarding them.
- Arrange emergency tarping from a qualified roofing contractor if the roof is open.
Following days: build the file.
- Get a written repair estimate and a contractor estimate with line items.
- Meet the insurance adjuster on site if you can, and walk the roof together.
- Submit a proof of loss if your insurer asks for one, within the deadline stated in your policy (How to File an Insurance Claim with IBC).
Emergency Mitigation vs. Permanent Repairs: What You Can Authorize
Most policies expect you to mitigate immediately and will reimburse reasonable, necessary costs. Permanent repairs, however, should generally wait until the adjuster has inspected, unless your insurer gives written approval to proceed.
A roof inspection from a qualified contractor gives you a written record of what failed and why. That report often does more for a claim than anything else you submit.
Ask your insurer in writing whether they will cover mitigation up to a stated limit without prior approval. Having that answer before a storm saves hours when you need them most.
Roof Insurance Claim Documentation: Photos, Receipts, and Records
Strong roof insurance claim documentation is the difference between a smooth claim approval and a long fight. Insurers pay what they can verify.
Build a simple evidence file with these items:
- Photographs of the damage from several angles, plus wide shots showing the whole roof
- Receipts for tarping, materials, and any emergency work
- A written contractor estimate with line items
Keep a short evidence log. A simple table works:
| Date | What Happened | Evidence Saved | Cost (CAD) |
|---|---|---|---|
| Oct 12 | Wind lifted shingles on north slope | Photos, video | $0 |
| Oct 12 | Emergency tarp installed | Receipt, photos | $0 |
| Oct 13 | Insurer notified, claim opened | Claim number, email | $0 |
Fill in your own costs as they come. A clean log makes the claim assessment faster and shows you took the duty to mitigate seriously.
Never throw away damaged materials before the adjuster has seen them. Discarded shingles or ruined ceiling drywall can turn a clear claim into a disputed one.
When Insurer, Contractor, and Homeowner Disagree on Scope or Cost
Disagreements over policy limits, scope, or cost are common, and they are not the end of the claim. The gap is usually not about whether damage exists, it is about how much of it the policy covers and at what price. Here is a step-by-step escalation path that keeps the claim moving.
Step 1: Get Both Scopes in Writing
Ask the insurer for the adjuster’s scope of work and your contractor for an itemized estimate. Compare them line by line: quantities, materials, labor, and any items the insurer removed. Most disputes trace to a handful of line items, often decking replacement, ice and water shield, or code-required upgrades.
Step 2: Ask for the Reasoning
Request, in writing, why any line was cut or reduced. Insurers should be able to point to a policy clause or an inspection finding. If the answer is vague, ask for the specific wording relied on.
Step 3: Request a Re-inspection
If the adjuster missed damage, hidden decking rot, cracked flashing, or damage on a slope they did not walk, ask for a re-inspection with your contractor present. A joint walk-through resolves many scope gaps on the spot.
Step 4: Clarify the Settlement Method
Compare replacement cost against actual cash value so you know exactly what depreciation was applied and why. If your policy settles at replacement cost, confirm what triggers the holdback release and what documentation the insurer needs to release it.
Step 5: Escalate Internally
If the gap stays open, escalate to the insurer’s claims supervisor or a dedicated complaints team. Put your request in writing, summarize the disputed items, and attach both scopes. Keep a dated log of every contact.
Step 6: Use the Formal Complaint Route
Every province has a regulator that oversees insurers and a formal complaint process. If internal escalation stalls, ask your insurer for its complaint procedure and the contact for the relevant ombudservice.
A contractor who documents well and explains the work in plain terms is your best ally here. We build written scopes for exactly this reason, so the insurer and the homeowner are looking at the same facts.
Disputes are won on documentation, not volume. Two itemized scopes, a written reason for each cut, and a dated contact log give you everything you need to escalate with confidence.
Frequently Asked Questions
Does home insurance cover emergency roof repairs?
In most cases, yes, if the damage came from a covered peril such as wind, hail, fire, or a falling tree. Your home insurance policy typically covers emergency roof repair to prevent further damage, including temporary measures like tarping. The key is that the damage must be sudden and accidental, not the result of wear and tear or poor maintenance. Contact your insurer before arranging permanent repairs, and keep every receipt for reasonable and necessary expenses.
Will insurance pay for temporary roof repairs after a storm?
Most policies reimburse temporary roof repairs when they are reasonable and necessary to prevent further damage. This includes emergency tarping, board-up, and minor patching. Keep all receipts and take photos before and after the work. Your insurer may send an adjuster to assess the damage first, so call them as soon as it is safe. Permanent repairs should wait until the claim is assessed and approved, or you risk having those costs denied.
Can an insurer deny a roof repair claim because of wear and tear?
Yes. Wear and tear, gradual deterioration, and lack of maintenance are standard policy exclusions. If your roof leak developed slowly over years, the insurer may deny the claim or offer only actual cash value rather than replacement cost. Regular maintenance records and a roof inspection history help prove the damage was sudden and accidental. If you are unsure, ask your adjuster to explain the specific exclusion in writing before you proceed with repairs.
How do I document roof damage for an insurance claim?
Take clear photos and video of the damage from the ground and, only if safe, from the roof. Capture wide shots and close-ups, and include something for scale. Keep all receipts for emergency repairs, tarping, and any temporary accommodation. Write a simple log of dates, who you spoke to, and what was agreed. A contractor’s written estimate and a detailed proof of loss form strengthen your roof insurance claim documentation and speed up the claim assessment.
Should I contact my insurance company before arranging emergency roof repairs?
Contact your insurer as soon as it is safe to do so, but do not delay emergency mitigation. Most policies require you to prevent further damage, so tarping or boarding up is usually expected. Call your insurer to open the claim and confirm what they need. If you cannot reach them immediately, document everything and proceed with reasonable temporary measures. Avoid permanent repairs until the adjuster has assessed the damage.
Roof damage after a storm is stressful, and the paperwork can feel like a second job. HighLow Roofing & Exteriors helps homeowners across Southern Alberta with emergency tarping, honest inspections, and clear written estimates you can hand straight to your insurer. We handle roof repairs and replacements, plus siding and eavestrough work, so one team covers the whole job. Request an estimate from HighLow Roofing & Exteriors and get your roof protected before the next storm rolls in.
